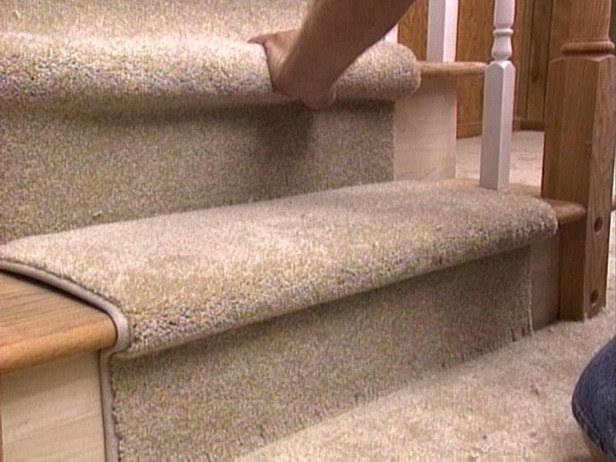
There’s a simple way to improve the look of plain wood or old run down stairs. That simple way is to install a stair runner. A stair runner can easily add colour and complement the hallway. It also adds a little padding to the stairs, making those early morning walks down the stairs just that little bit more enjoyable. The brilliant thing is, installing a stair runner is something you can do yourself.

In this post, I’m going to guide you through the steps of installing a stair runner.
How to Install the Stair Runner
Step 1 – Find out the length of the stair runner
First, you will need to find out what length of runner will be needed. To find this out, simply measure the height of a riser and the height of a tread. Add the two numbers together and multiply it by the number of stairs. It’s best to be on the safe side, so add another 10 or so inches to this and you will have found the length of runner you need.
Runners come in a variety of lengths so don’t worry if you’ll need to buy two runners. I’ll guide you through connecting the two runners later in this article.
Step 2 – Mark it Out
Using a tape measure, find out the centre point on the stairs and mark the position. You can now use this mark to centre the runner on the stairs. Make sure there is an even amount of space to the right and left of the runner. Having even a 1cm difference will draw attention once the runner is fitted.
Step 3 – Lay the Padding
It’s now time to cut the padding to size and lay it. Take the padding and cut a piece which is a few inches longer than the tread. Test this padding by placing it on the stair, under the runner. You should move the padding back from the edge slightly, to make for a more natural looking curve. If all looks well, you can start cutting the rest of the padding to size.
Use the padding you have just cut as a template for the other pieces of padding. You will need one piece of padding per each step. Now place a section of padding on the first stair. First, make sure the padding is centred properly. Once you have it centred, make sure to leave a small gap between its back edge and the riser. (The runner will be forced to lie in this little gap).
Now, get your staple gun out and start stapling the edge of the padding in place. Make sure you put enough staples in to prevent it from shifting position in the future. Staple the front edge in the same manner, a few centimetres back from the edge of the stair. Then simply fold the rest of the padding over the edge of the stair, and staple it to the riser.
Once you have the first piece of padding in place, fitting the rest becomes easy, as you simple repeat the same technique. Once you have all the padding in place, you can finally move on to installing the runner.
Step 4 – Install the Runner
Most people find installing the runner easy, as they have already practiced by laying the padding. Keep in mind that the runner will be visible, unlike the padding underneath. A dodgy staple or two here will be noticed.
Start at the top of the stairs. Place some double sided carpet tape on the first riser. This will help keep the runner in place while you add the first few staples. Push the runner up against the carpet tape, taking care to make sure it is centred both vertically and horizontally. Once you are sure it is perfectly centred, grab a pneumatic stapler and staple the runner to the riser. Use as many staples as you deem fit to keep the runner in place.
Remember that gap you left between the padding and the riser? Using a bolster chisel, push the runner neatly into this gap. Smooth out any creases and staple the runner along the gap. Next, fit the runner over the edge of the stair, ensuring that it is smooth and centred. Tuck the runner under the edge and staple it into place.
Well done! You’ve got the first step out of the way. As was the case with the padding, fitting the rest of the steps comes easy. Continue using the same method until you reach the end of the runner.
Step 5 – The Finishing Touches
Once you reach the end of the runner, you’ll need to make some finishing touches. Thankfully this step can also be used to attach another runner.
Trim the runner 5cms past the base of the runner. You can now fold this excess to create a neat hem. If you are attaching a second runner, tuck this hem into the padding gap and staple it in place. Make another neat hem on the second runner and staple it down, on top of the first runner.
If you’re at the end of the stairs, make the same fold to make a hem and staple it directly to the riser.
Congratulations! You’ve just installed your very own stair runner. The last step is to enjoy it.
Adam Gibson is a freelance writer currently studying at Stirling University. This article was written on behalf of Kens Yard, a Stair Parts seller online.
